
David Drysdale wanted to add Capsicum security features to Linux after he noticed that FreeBSD already had Capsicum support. Capsicum defines fine-grained security privileges, not unlike filesystem capabilities. But as David discovered, Capsicum also has some controversy surrounding it.
Capsicum has been around for a while and was described in a USENIX paper in 2010: www.cl.cam.ac.uk/research/security/capsicum/papers/2010usenix-security-capsicum-website.pdf.
Part of the controversy is just because of the similarity with capabilities. As Eric Biderman pointed out during the discussion, it would be possible to implement features approaching Capsicum's as an extension of capabilities, but implementing Capsicum directly would involve creating a whole new (and extensive) abstraction layer in the kernel. Although David argued that capabilities couldn't actually be extended far enough to match Capsicum's fine-grained security controls.
Capsicum also was controversial within its own developer community. For example, as Eric described, it lacked a specification for how to revoke privileges. And, David pointed out that this was because the community couldn't agree on how that could best be done. David quoted an e-mail sent by Ben Laurie to the cl-capsicum-discuss mailing list in 2011, where Ben said, “It would require additional book-keeping to find and revoke outstanding capabilities, which requires knowing how to reach capabilities, and then whether they are derived from the capability being revoked. It also requires an authorization model for revocation. The former two points mean additional overhead in terms of data structure operations and synchronisation.”
Given the ongoing controversy within the Capsicum developer community and the corresponding lack of specification of key features, and given the existence of capabilities that already perform a similar function in the kernel and the invasiveness of Capsicum patches, Eric was opposed to David implementing Capsicum in Linux.
But, given the fact that capabilities are much coarser-grained than Capsicum's security features, to the point that capabilities can't really be extended far enough to mimic Capsicum's features, and given that FreeBSD already has Capsicum implemented in its kernel, showing that it can be done and that people might want it, it seems there will remain a lot of folks interested in getting Capsicum into the Linux kernel.
Sometimes it's unclear whether there's a bug in the code or just a bug in the written specification. Henrique de Moraes Holschuh noticed that the Intel Software Developer Manual (vol. 3A, section 9.11.6) said quite clearly that microcode updates required 16-byte alignment for the P6 family of CPUs, the Pentium 4 and the Xeon. But, the code in the kernel's microcode driver didn't enforce that alignment.
In fact, Henrique's investigation uncovered the fact that some Intel chips, like the Xeon X5550 and the second-generation i5 chips, needed only 4-byte alignment in practice, and not 16. However, to conform to the documented specification, he suggested fixing the kernel code to match the spec.
Borislav Petkov objected to this. He said Henrique was looking for problems where there weren't any. He said that Henrique simply had discovered a bug in Intel's documentation, because the alignment issue clearly wasn't a problem in the real world. He suggested alerting the Intel folks to the documentation problem and moving on. As he put it, “If the processor accepts the non-16-byte-aligned update, why do you care?”
But, as H. Peter Anvin remarked, the written spec was Intel's guarantee that certain behaviors would work. If the kernel ignored the spec, it could lead to subtle bugs later on. And, Bill Davidsen said that if the kernel ignored the alignment requirement, and “if the requirement is enforced in some future revision, and updates then fail in some insane way, the vendor is justified in claiming 'I told you so'.”
The end result was that Henrique sent in some patches to make the microcode driver enforce the 16-byte alignment requirement.
As a father of three girls, I have piles and piles of Disney DVDs and Blu-rays. I occasionally look at the “Digital Copy” information and roll my eyes, because it requires some odd Windows DRM software or some other convoluted watching method that usually isn't possible or even interesting for me.
Recently, however, Disney did a really cool thing and released an Android app that allows you to stream any movie you have purchased from the Google Play store, iTunes store or from a department store (assuming the store copy came with that seemingly gimmicky digital version).
I tried it today, and sure enough, there was an insert in our Saving Mr. Banks Blu-ray disk that allowed me to redeem a copy of the movie on my Disney account. Now that movie is accessible to me through any Android app along with any iOS app or even a Web browser (using Flash, unfortunately).
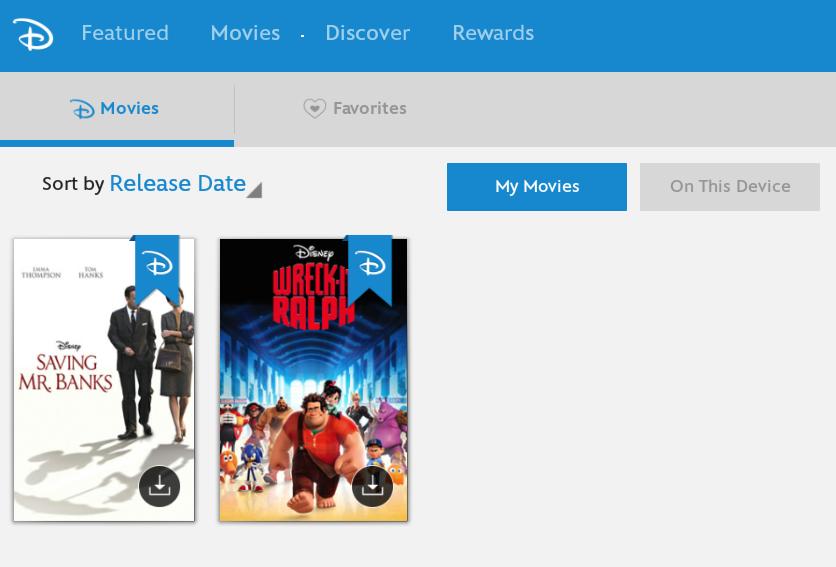
If you install the app and connect it to your Google Play account, you'll get a free copy of Wreck it Ralph, even if you haven't purchased any movies in the past.
Don't get me wrong, the movies still are completely crippled with DRM, but at least they are accessible from a multitude of devices. It's the first time the “digital version” of the movies hasn't been a joke—at least in my world. If you have a collection of Disney DVDs with unclaimed codes for digital copies, you can add them to your account and stream the movies instantly. It's actually pretty cool!
To create your Disney account, head over to disneymoviesanywhere.com.
If you've ever wanted to make an animated film, the learning curve for such software often is really steep. Thankfully, the Pencil program was released and although basic, it provided a fairly simple way to create animations on your computer (Windows, Mac or Linux) with open-source tools. Unfortunately, the Pencil program was abandoned.
And really, that's the coolest part of open-source software. Building on the incredible Pencil program, a new project was born. Pencil2D is under active development, and it's a cross-platform application allowing for a frame-by-frame animation sequence to be drawn and exported. Pencil2D supports soundtracks, multiple layers, imported graphics and a really cool onion-skin feature so that subsequent frames can be changed by increments making for smooth animations.
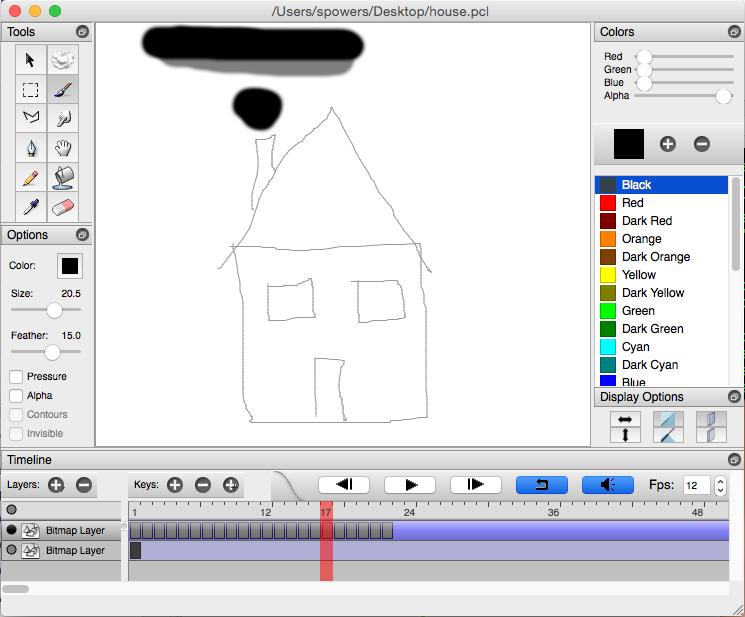
The program isn't perfect, and it does crash from time to time. As you can see in my screenshot, it enables a non-artist like myself to create animations. (If I pressed play, you'd be shocked and amazed at my puffing chimney!) Whether you want to make a quick animation or produce a full-length movie, Pencil2D is a neat program that will cost you nothing to try. Download your copy, and see how you can contribute to the project at www.pencil2d.org.
3-D printers are becoming popular tools, dropping in price and becoming available to almost everyone. They can be used to build parts that you can use around the house, but more and more, they also are being used to create instruments for scientific work. Although a growing library of objects are available in several on-line databases, there is nearly an infinite number of possible things you might want to build. This means you likely will want to design and build your own creations.
In this article, I take a look at FreeCAD, an open-source parametric 3-D modeler (www.freecadweb.org). A parametric modeler builds the structures in the design based on a set of properties. Changing the design, thus, is simply a matter of changing the properties of said design.
FreeCAD can read and write several different file formats used in modelling and 3-D printing. It is built as a core application, with plugin modules made to handle specific jobs. Python is the language of choice, because there actually is a built-in Python engine. Additionally, FreeCAD itself can be imported into your own Python script. This gives you access to all of the geometric tools for use in your own code.
FreeCAD already should be in your distribution's package management system. In Debian-based ones, it is simply a matter of using the command:
sudo apt-get install freecad
In the latest version of Ubuntu, the latest version of FreeCAD actually is available. But, you always have the option of building FreeCAD from source, if you need some non-standard option.
To start it, you can just run freecad. It will pop open a window with a blank workspace in it (Figure 1).
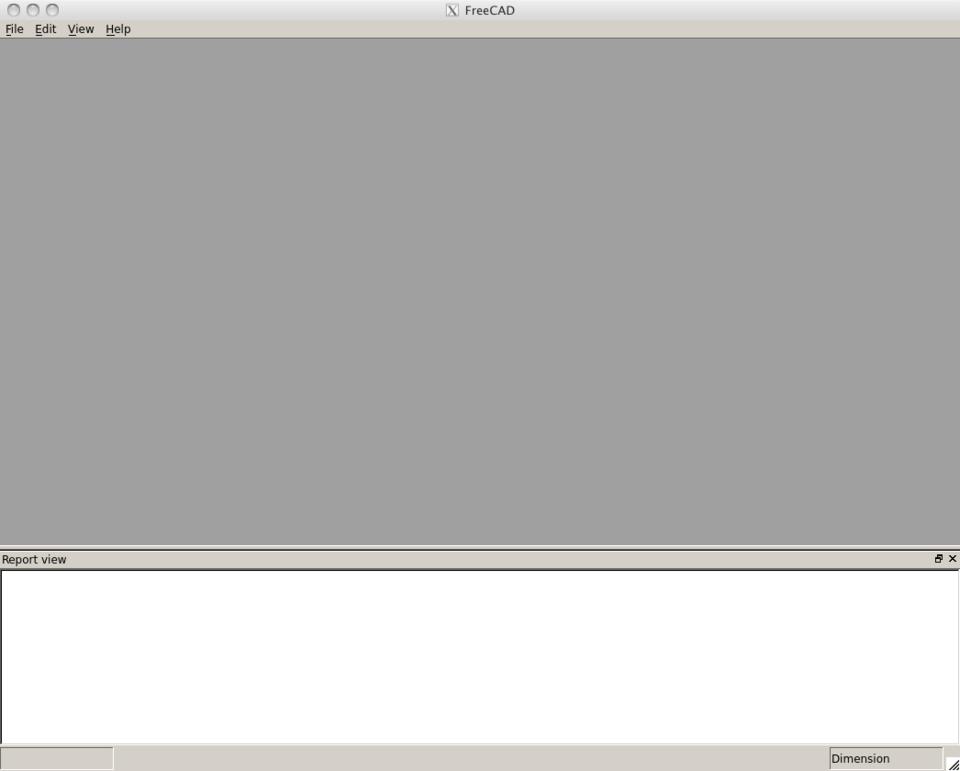
Figure 1. On start up, FreeCAD gives you a blank workspace so you can begin working.
FreeCAD uses a workbench concept to give you groups of tools based on the task you are doing at any particular time. You can access the available workbenches by clicking on the View→Workbench menu item. Here, you will get a drop-down list of all of the available options.
As I'm focusing on the idea of building a 3-D object, let's start by activating the parts workbench. Clicking on the View→Workbench→Part menu item will rebuild the interface and introduce all sorts of new tools for you to use (Figure 2).
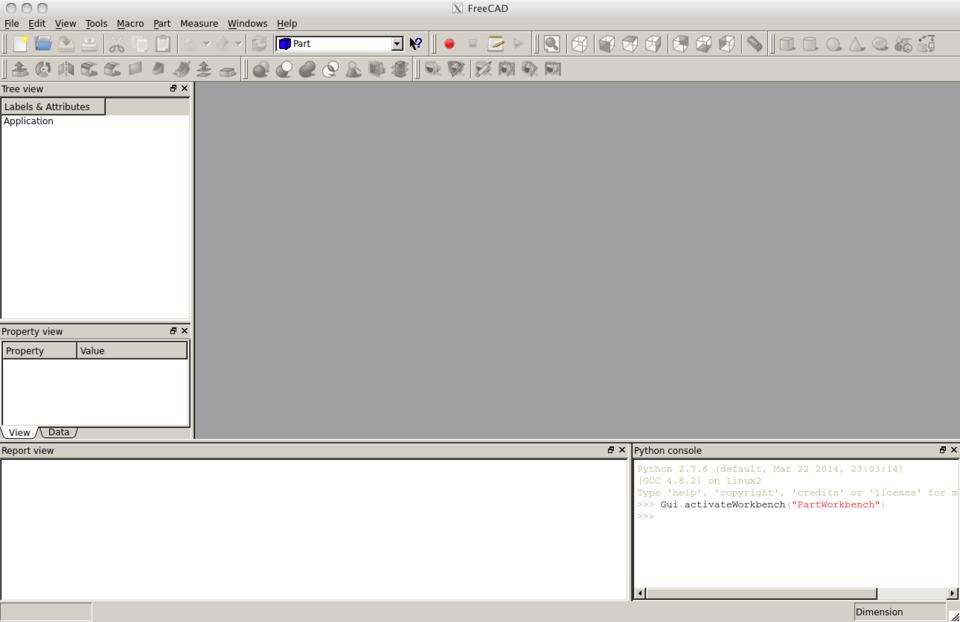
Figure 2. Selecting the parts workbench will change the interface, giving you access to all sorts of new tools to use for building.
On the left-hand side, you should see two sub-windows providing a tree view of the objects in your design and a property view of specific objects. Along the bottom are a report view and a Python window. The majority of the display currently is a blank slate. You need to start a new design by clicking on File→New. This will open a new, unnamed document in the main part of the GUI. It will be renamed when you first save the project. You can do this by clicking File→Save. You can add primitive objects to this new document either by clicking on the associated icon in the top toolbar or by clicking on the Part→Primitives menu item.
Once you have an object in the document, you can click on it to see its properties on the left-hand side. There are two tabs in the property view pane. The initial tab is the View tab, which provides details on the presentation of your object. The second tab is the Data tab, which contains the details for the construction of your object.
In Figure 3, you can see a torus that I have started to construct. A torus is described by three angles and two radii. The first two angles describe how much of the torus exists in the cylindrical direction. The third angle describes how much of the torus exists around the circle. The first radius gives the overall radius of the torus, and the second radius represents the cylindrical radius.
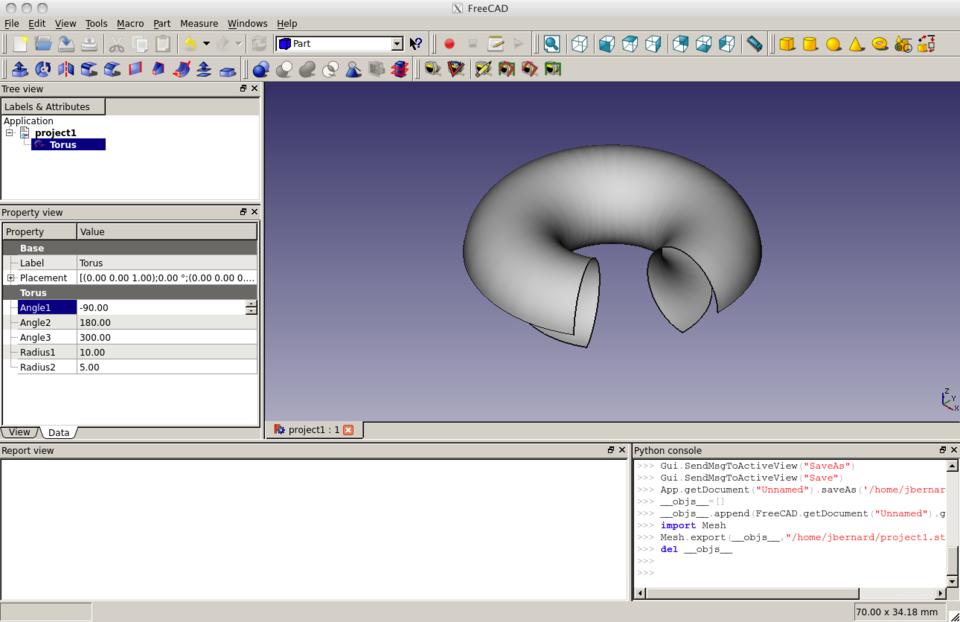
Figure 3. You can build your design based on primitive objects.
Lots of other tools are available as well. You can select a different workbench by clicking on the View→Workbench menu item, or you can select a new workbench from the drop-down menu in the center of the top toolbar.
To look at another example problem, say you wanted to generate a mesh from your design to feed into some other program, like a computational fluid dynamics program. To start, you will need to select the mesh workbench. This will bring in a new set of tools to work with meshes. You can generate a mesh from your design by clicking the Meshes→Create mesh from shape menu item. This will pop open a new pane on the left-hand side to control the meshing process. You can choose either standard or mefisto meshing, along with the maximum edge length. Once these are set, you can select the shape you want to mesh and click OK. This will generate the mesh and leave you with a mesh information box describing the number of points, facets and so on (Figure 4).
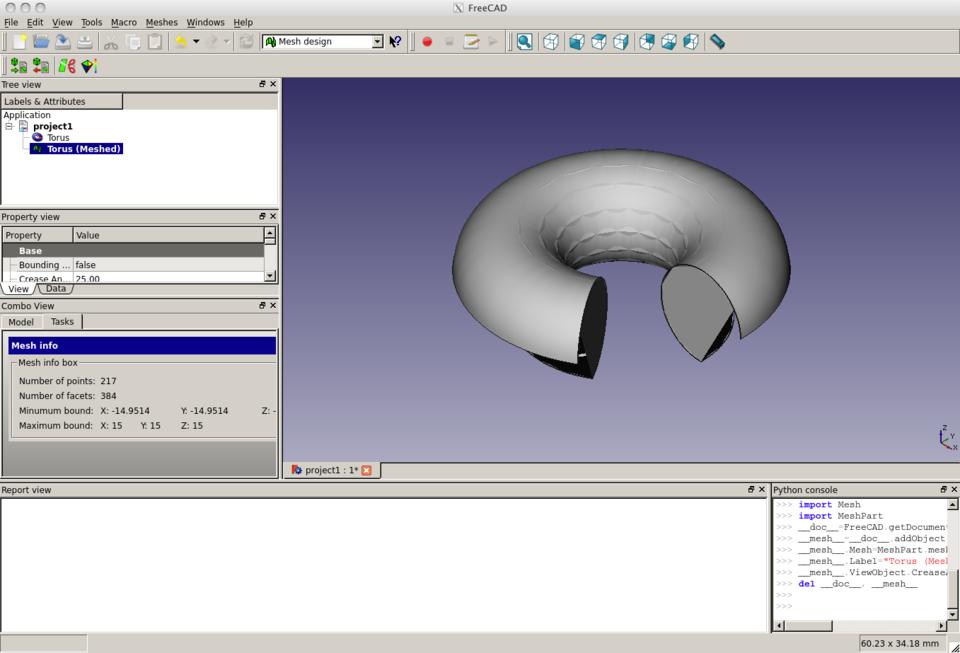
Figure 4. You even can do work on meshes with FreeCAD.
Tools are available to work on these meshes as well. For example, click on the Meshes→Analyze→Evaluate & Repair mesh menu item. This will pop up a new pane on the right-hand side where you can analyze your new mesh and find problems like duplicated faces, duplicated points or degenerated faces. If any of those issues are found, a repair button is available to go ahead and fix those issues. This is something that is more likely to happen with very complex objects created from several primitives stitched together.
Once you have your mesh generated and properly tweaked and optimized, you can click on the Meshes→Export mesh menu item, and select the file format you need. For example, if you want to use it in some project in CFX, you could export it as a NASTRAN file. There are several options that should be supported by most other programs that can take mesh files as input. So FreeCAD can act as a very good pre-processing step in many projects.
Once you have finished your object, you will want to have it in a format that can be used in some other context. To do this, you can export your design in one of any number of available formats. For example, if you want to send your design to a 3-D printer, you can export it in an STL file format. To do that, click on File→Export and select the stl option from the drop-down list (Figure 5). You then can take this file and use it in the printing software for your 3-D printer.
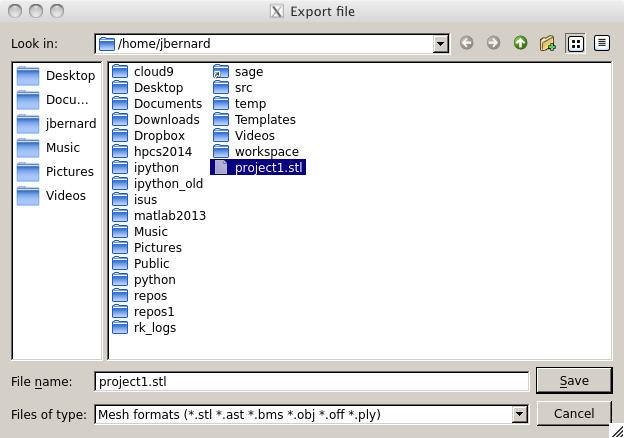
Figure 5. You can export your design to the STL file format.
Now that you can build your own objects, you can design the exact piece you need for that scientific experiment, or create that specific replacement part you need. If you can, you also should consider sharing your work in one or more of the on-line libraries. That way, you may become famous for your miracle widget or amazing do-hickey. In any case, it is always good to share information so others can build on it to do even greater things.
Back in 2010, Kyle Rankin did an incredible series on Linux Troubleshooting. In Part 1 (www.linuxjournal.com/magazine/hack-and-linux-troubleshooting-part-i-high-load), he talked about troubleshooting a system struggling with a high load. At that point, I'd already been a system administrator for more than a decade, but it was the first time I'd ever heard of iotop.
If you weren't a subscriber in 2010, I highly recommend you read Kyle's entire series. Either way, I use iotop so often, I felt it was prudent to mention it again all these years later. The concept is pretty simple. It's like the top program, but instead of CPU and memory usage, it monitors disk I/O. If you have a system that is extremely slow to respond, but can't seem to figure out what is going on, give iotop a try. You'll probably have to install it, as I've never found a system with iotop installed by default, but it should be in the software repository of just about every Linux distro. And, if you find it useful? Be sure to read Kyle's entire series; it's just as helpful today as it was five years ago!

Figure 1. The Bitcoin dæmon is notorious for using a lot of disk I/O.
If you can't be funny, be interesting.
—Harold Ross
If you want change, you have to make it. If we want progress, we have to drive it.
—Susan Rice
Never regret something that once made you smile.
—Amber Deckers
Never let the future disturb you. You will meet it, if you have to, with the same weapons of reason which today arm you against the present.
—Marcus Aurelius Antoninus
Part of being creative is learning how to protect your freedom. That includes freedom from avarice.
—Hugh Macleod
In past articles, I've discussed my BirdCam setup and how it automatically archives video footage from my bird feeders to YouTube every night. That's a really cool process, but unfortunately, it saturates my upstream bandwidth in the evening. I could get crafty with my firewall and limit the priority of traffic from my BirdCam server, but because it's using standard Web protocols to upload to YouTube, the firewall rules would be fairly complex. Thankfully, there's Wondershaper.
Because I'm running my BirdCam server on an independent machine, it doesn't affect any other programs on the server if I just limit the throughput on my Ethernet interface. There are three basic ways I know of to limit bandwidth on a Linux machine: using tc, trickle and Wondershaper.
The tc program is by far the most powerful. It's also by far the most complex. In fact, it's so complex that for my lazy purposes, it just isn't ideal. If you're looking for protocol-specific QOS on a local interface, tc is probably the tool for the job. It is overkill for me.
The trickle (and trickled) program seems like an ideal way to control the bandwidth on a per-application level. Supposedly, you simply can start a program with trickle, and it will limit the bandwidth available. Try as I might, however, I never could get it to do its job. Yes, I'm sure it's a perfectly wonderful tool, but again, I want something dead simple. Enter: Wondershaper.
After installing Wondershaper on your system, it works by controlling the bandwidth on an entire interface. So this:
sudo wondershaper eth0 1250 125
will limit the eth0 interface to 10mbps down and 1mbps up. The numbers are listed in KB/s (that wasn't clear to me at first, but Google will convert mbps to KB/s for you). The setting is system-wide and should limit bandwidth for any network application. To clear the limit:
sudo wondershaper clear eth0
I simply put the command in my root user's crontab to execute on startup, and my BirdCam server doesn't monopolize my bandwidth when it uploads nightly to YouTube. It seems like a simple tool, and it is. But, it works so well and provides such a useful service, I'm making Wondershaper this month's Editors' Choice winner. It's not a new program, but it's something I'd never used before, and I can't imagine living without it!
(NOTE: before I get hundreds of e-mail messages, yes, I know Wondershaper is a program from 2002. I mentioned other newer, more robust alternatives above, but the truth is, Wondershaper still is a powerful, simple tool that does one thing and does it really well.)
